


ShipA2Z system supports intelligent warehouse distribution functions. The customer only needs to submit outbound orders in the OMS system. The system will allocate the outbound order to the best-selected warehouse according to the product inventory and the last-mile delivery distance to minimize your delivery costs.
1. login to your OMS account
Log in:https://seller.shipa2z.com/login
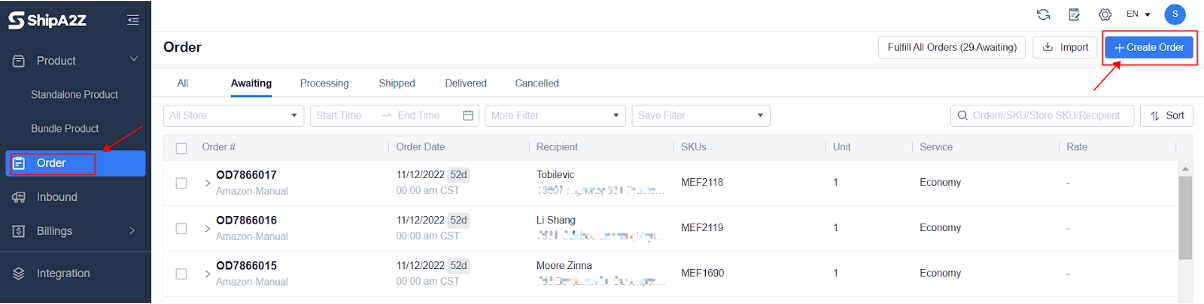
2. Submit the outbound order manually
Order -> Create Order -> Add Product -> Select Service – Parcel Delivery -> Recipient Information -> Preview Order -> Submit Order
Add Product
SKU/product name: Only products already in stock can be selected.
Quantity: The number of products to be shipped for each order.
Pkg Qty: The Pkg Qty here will be automatically filled only when the product quantity in the order is one or when the “Number of products in a single package” is maintained in the product creation.
The system defaults to one parcel if only one product is in a single outbound order.
There are two processing methods if multiple products are contained in one single outbound order:
If there is no need to split the boxes for inbound and outbound, the customer needs to fill in the “Number of products in a single package” on “Inventory and Logistics” of “Products.” When submitting an order, the system automatically identifies the outbound boxes Qty according to the product’s SKU and quantity. (It is recommended to maintain when creating product information).
If the products need to be split into boxes for inbound and outbound, and the “Qty Per Package” is not maintained, there is no definition of the number of boxes here. After the customer submits the order, the warehouse will manually split the order in the system according to the number of packages during the outbound operation.
Insurance: If you need to purchase insurance service for shipping, you need to fill in the insurance declared value of the product when you create the product. The insurance information will be automatically brought out when the order is submitted, and you can choose the number of products that need insurance service. The cost will be deducted from the shipping fee.
Add product: For multiple SKUs in a single order, click “Add Product” to add SKUs.
Select service – “Parcel Delivery“
Economy: Use ShipA2Z shipping service, which belongs to Ground service, including UPS Ground and FedEx Ground;
2-Day Service: Use ShipA2Z shipping service, Which belongs to Express service, including UPS 2 Day Service and FedEx 2 Day Service, etc., for example, UPS 2nd Day Air A.M., UPS 2nd Day Air, FedEx 2 Day AM, FedEx 2 Day, etc.
Next Day Service: Use ShipA2Z shipping service, which belongs to Express service, including UPS 1 day service and FedEx 2 day service, etc., for example, UPS Next day air, UPS Next air saver, FedEx First Overnight, FedEx Priority Overnight, etc.
Upload shipping labels: Customers provide shipping labels and fill in relevant logistics information to facilitate subsequent order tracking:
- Carriers
- Shipping Service
- Tracking number
- Shipping label upload
Disclaimer: To further standardize the after-sales service issues, ShipA2Z will not be responsible for any loss caused by those outbound orders without using ShipA2Z shipping labels. The customers will handle the subsequent losses caused by the carrier, including but not limited to the loss, damage, logistics delay, etc.
Shipping Signature Type: When using ShipA2Z logistics service, and can be selected when signature service is needed.
Ship To
FBA address: When the recipient address is an FBA address, you can select the FBA address.
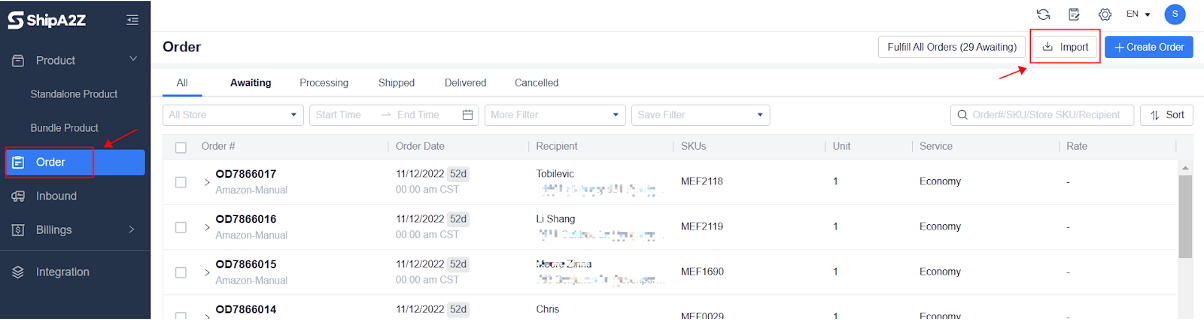
3. Batch creation of outbound orders
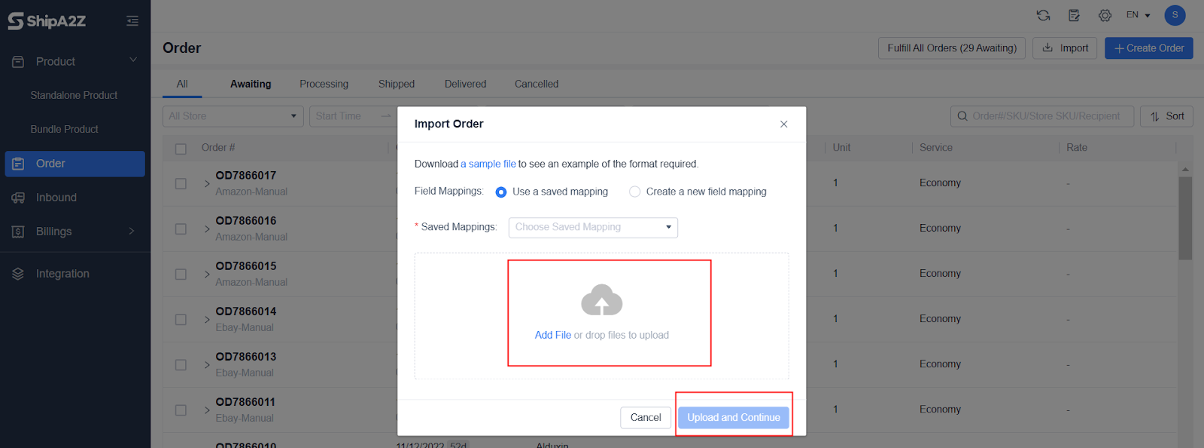
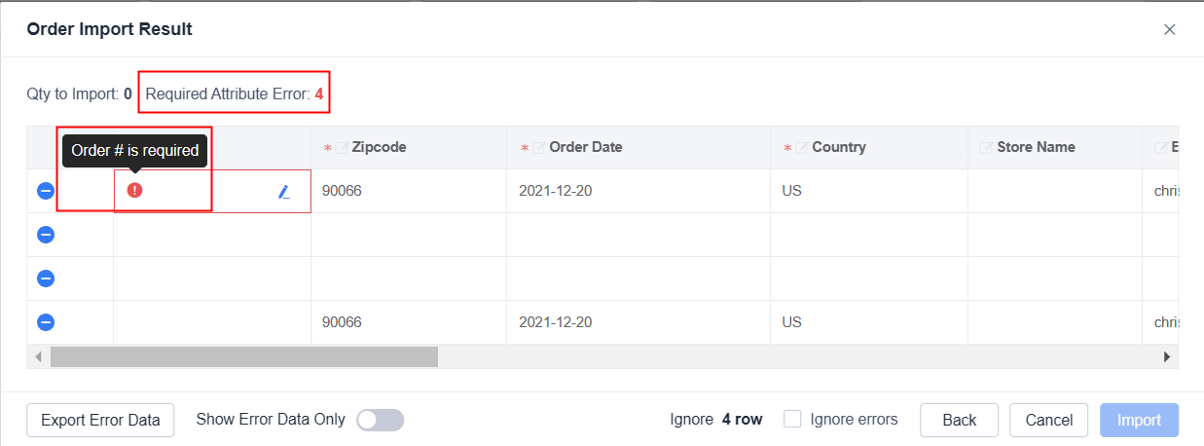
Orders > Import >Download a sample file > Add File or drop files to upload > Fulfillment Order.
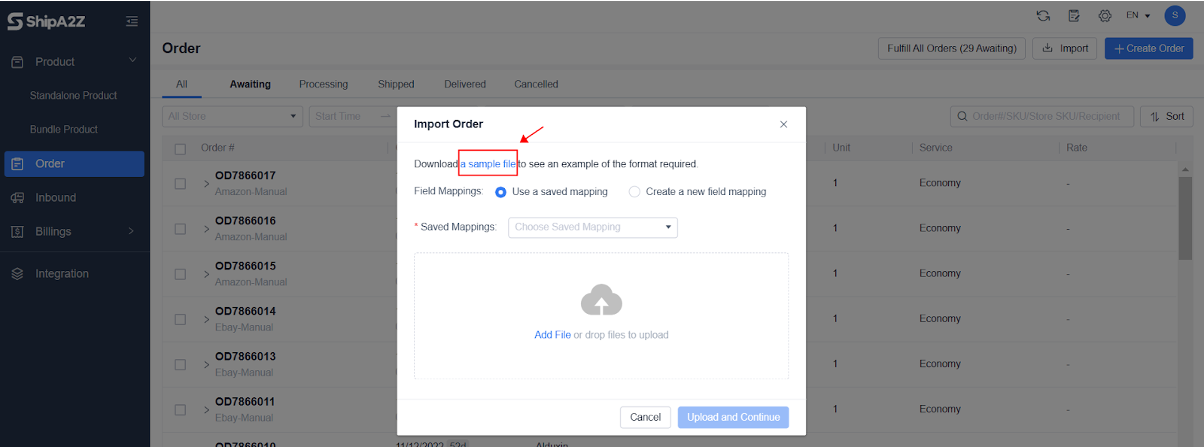
Refer to the Instruction in sheet2 of the Excel file to fill in;

Uploading Excel files in the OMS system
The system will display the uploaded data. If there is an error, it will point out the corresponding location, which needs to be modified before proceeding.
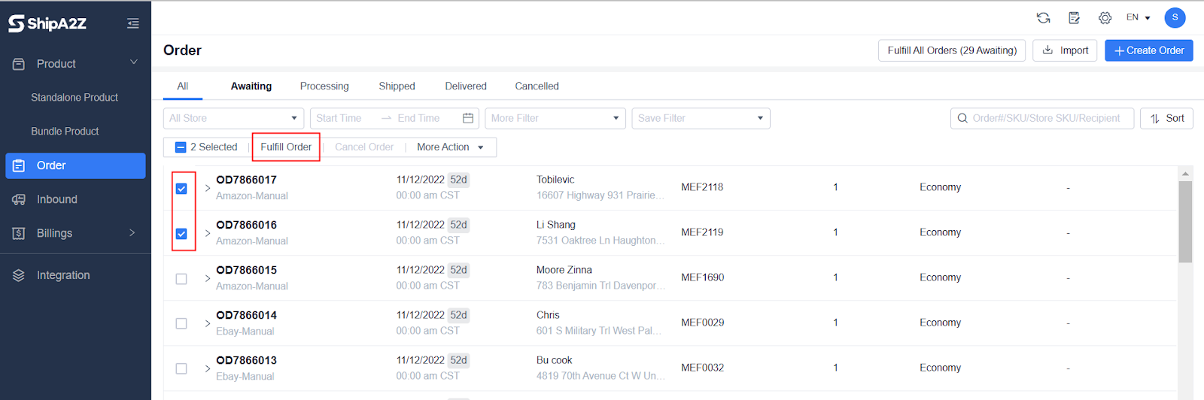
After the order is uploaded, it is in “Awaiting” status. Select the orders that need outbound, and click “Fulfill Order” or “Fulfill All Orders.” The order status will be updated to “Processing” and synchronized to the warehouse.
The warehouse will synchronize with the OMS system after completing the fulfillment. The customer can click the order to check the status. The status of “shipped” indicates that the warehouse has completed the shipment; “in transit” and “completed” means the carrier shipping status. And when the parcel is delivered successfully, the “Completed” status will be displayed.
4. Integration
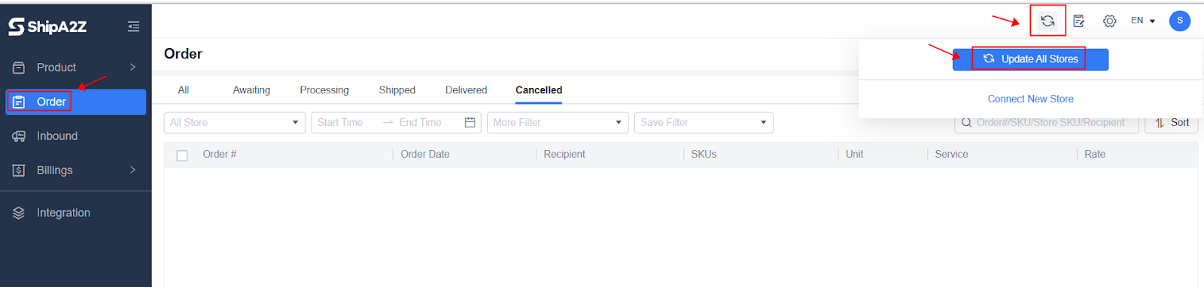
The system supports integration with different e-commerce platforms. It must integrate with e-commerce platforms before synchronizing orders to the OMS system. If the same products in different stores are marked with different SKUs, you must do the Alias Mapping product first. When orders are awaiting on e-commerce stores, click the Refresh button in the upper right corner > Update All Stores, and the orders will be synchronized to “Awaiting” status.
Select the orders that need to be fulfilled, click “Fulfill Order” or “Fulfill All Order,” then the orders will be updated to “Processing” and synchronized to the warehouse.
The tracking number will be uploaded to the e-commerce store synchronously once the label is created via ShipA2Z.